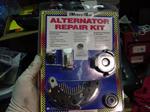
Symptoms:
Squealing, smoking. Mine failed once I slowed down to get fuel after a 'brisk" run. I was going cross country and was stranded in Montana but that is another story (see "Field Replacement of Alternator")
This article is about rebuilding the alternator.
|
Click on any image to see close-up. When you do so, use your browser "back" button to return.
\
|
|
Tools Required:
1. Rebuild kit
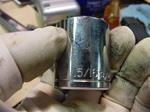
2. 15/16 in socket
3. digital camera.
4. torque wrench (I'll say right up front here I can't remember the various torque used on each fastener. These can be looked up just based on the size of the hardware)
|
|
|
Procedure:
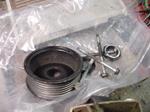
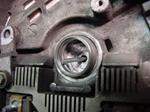
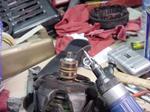
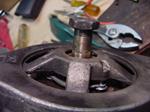
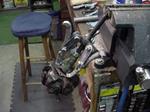
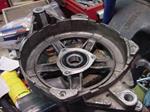
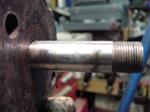
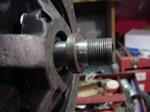
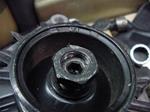
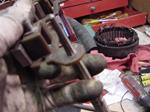
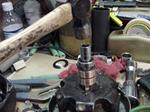
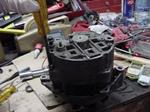
Using the 15/16 socket remove the pulley(shown) and the cooling fan and spacer (not shown). Then remove the long bolts holding the shell together.
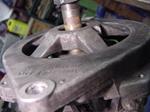
Take plenty of your own pictures. Capture the details like which insulating washer goes where.
|
 |
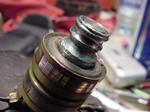
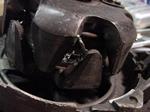
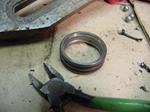
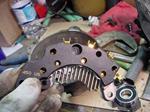
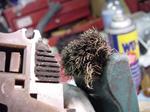
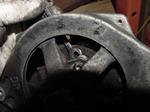
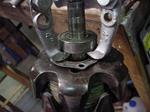
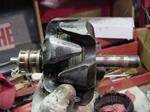
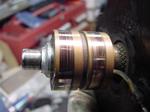
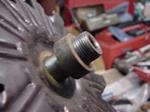
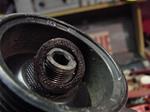
This is the fried bearing. The groves you see are what's left of the inner race of the bearing.
|
|
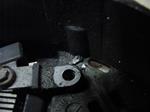
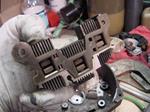
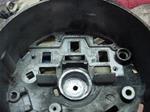
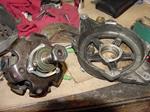
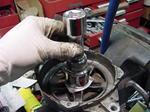
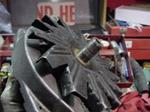
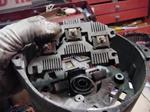
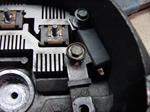
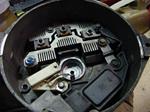
Notice the debris in the rotor/stator assembly. Remove and clean this area well.
|
|
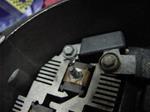
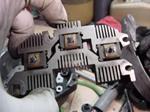
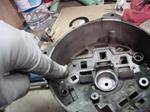
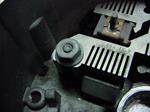
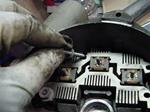
Inspect for debris around the diode assembly.
|
|
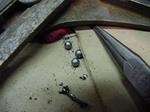
You might find ball bearings too. They can be magnetic and stick in places. Be thorough in your inspection/cleaning.
|
|
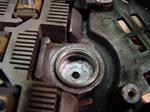
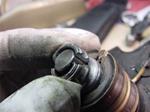
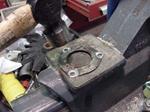
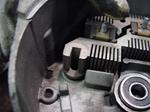
The rear bearing outer race is still stuck in the rear of the assembly. This needs to be extracted.
|
|
The race can be pounded out from behind by placing a rod into the grove where the ball bearings use to be. If your bearing assembly is in one piece then just pound it out at the inner race. Don't worry about damaging it. It will not be reused.
|
|
This is the extracted race.
|
 |
The diode assembly can be checked for forward and reverse bias using a Multimeter. Or you can just replace them with the new ones in the kit. I left mine in. They were fine.
|
|
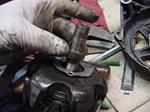
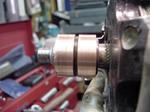
Use a cut-off wheel and chisel to break off the left over inner race. Do not kick the shaft.
|
|
Cut the bottom of the race off again being careful not to nick the shaft.
|
|
Diode pack removed for cleaning and inspection.
|
 |
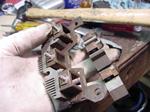
There are three mounting bolts with two diodes in each. There is a total of 6 diodes.
|
|
This is the new diode pack which was not used.
|
 |
With the diode pack out clean the inside of the rear shell.
|
 |
Clean out the anode holes.
|
 |
Clean out the head sinks.
|
 |
Here are the two halves of the diode assembly all clean.
|
 |
Now to do the front assembly.
|
 |
Be prepared. This was the hard part.
|
 |
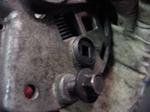
Getting at the screws is hard. See the open-end wrench?
|
 |
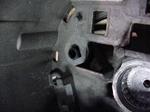
One small turn at at time.
|
 |
OK, finally all three of the little suckers off.
|
 |
Now use a puller to get the front bearing off.
|
 |
Be patient. It will come off eventually.
|
 |
Remove and do NOT lose the spacer.
|
 |
Remove, clean and straighten the inside plate.
|
 |
Put in the new front bearing. See it sitting in there?
|
 |
Tap the bearing into place with a similar size socket.
|
 |
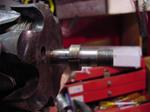
This is the shaft assembly before cleaning
|
 |
Note the rust before.......
|
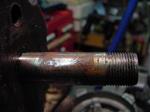 |
and no rust after using a wire brush.
|
 |
The contact points for the brushes before cleaning.....
|
 |
Now after using an emery cloth on them.
|
 |
Time to start some reassembly. Put the inside spacer on.
|
 |
Next put the front shell on.
|
 |
Put the outside spacer on.
|
 |
Next put on the cooling fan.
|
 |
Now another spacer.
|
 |
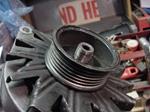
and now the pulley.
|
 |
now the washer.
|
 |
And the nut.
|
 |
I did replace the black plastic insulator piece. It was cracked. This is the new one as viewed from the outside.
|
 |
This is a view of the new black plastic insulator from the inside.
|
 |
| I used a reamer to make sure the diode pack went well over the new black plastic insulator. |
 |
|
|
Put the diode pack back in.
|
 |
|
Here you can see the diode pack in place. Also note the rear bearing is sitting in position but is NOT mounted yet.That is covered soon. It is mounted to the shaft in the next slide to keep the stress low on the ball bearings.
|
 |
| Now some of the hardware goes in to hold the diode pack. |
 |
More hardware going back in.
|
 |
|
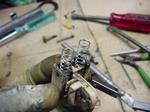
BEFORE INSTALLING THE NEW REAR BEARING take it in your one hand and hold it by the inner race. Now spin the outer race. It should spin freely. Listen for ANY sign of grinding or vibration. My first rebuild kit had a bad bearing in it.
You can now put the bearing on the rear shaft and use a socket to tap it into place. Pick a socket that contacts the inner race only. DO NOT use one at is too big. It should just be big enough to not touch the shaft as you put it down to touch the bearing. This way there is no stress to the ball bearings.
|
|
Some of the electronics going in
|
|
Now it's in place being held with hardware that has plastic insulators on them.
|
|
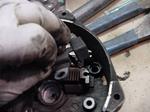
Here I have the new brush assembly (white plastic) with a small metal pin holding the brushes in. It's attached to the socket assembly (black) but it didn't fit right sooooo
|
 |
I took it off and placed is side by side with the old brush assembly and moved the new graphite brushes (shown to the right) into the old yellow assembly. Fit perfectly.
|
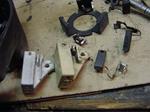 |
Here the old yellow assembly is shown with the new springs before the graphite brushes were installed.
|
 |
Here is the rebuild brush assembly and black socket reinstalled.
|
 |
Now put the two shells back together and install the long thin bolts. You're done !!
|
 |
| |
|
| |
|
Expected Result:
Once you have reassembled the unit take it to a cooperating parts store for testing before reinstalling it. You can save time by finding anything wrong before going through all the work of installing it.
|
|
Related Articles:
|
|
|
Other Links:
|
|